Asid and his Dogs of War ran a HQ-in-the-Saddle game of Scourge of War: Waterloo over the weekend. I couldn't participate due to other responsibilities, but my friend Doug (panzerde) took one of the commands. What didn't quite click with me -- although I think Asid tried to tell me on-line -- was that some lunatic has created the classic KS Meckel map for Scourge of War: Waterloo. I wonder what Baron von Reisswitz would have made of that.
The write-up is nicely done and well worth a visit:
http://dogsofwarvu.com/forum/index.php/topic,3784.msg16193/topicseen.html#new
Wednesday, December 7, 2016
Saturday, November 26, 2016
"War at Sea" -- A Love Letter, Albeit a Faded One
As I write this, I am sick in love with both my kriegsspiel dice (see below), and Battlefield 1. The latter, a glorious ode to organized violence and the Great War, has encamped in my head space like no other shooter since Doom. Among its many enchantments, Allied medics are depicted as Indian troops. Given my affection for "Gunga Din", this is quite a heady thing.
Earlier this week, though, HL and I spent quality time with a very old friend that I did not realize was so dearly missed -- Avalon Hill's War at Sea.
 I don't think I've ever owned the game before; not in all these years. I've played the devil out of it, though. It may, indeed, be the very first war game I ever played. The first war game I ever bought, which I've documented several times elsewhere, was Starship Troopers, purchased from a Milwaukee Gimbel's (were there non-Milwaukee Gimbel's?) I was ten at the time, though, and could never quite get my head around the rules. Only a few years later, my best friend and I had at War at Sea and something about war gaming clicked. I can't honestly say who owned that copy of the game. I should probably ask. All that to the side, I was wandering around Half-Price Books with a 50%-off coupon in my hand and this above-photographed copy of the game was on offer. I checked it for contents -- as one absolutely must when purchasing from that often incautious purveyor of used games -- and brought it home.
The first thing that struck me was how small the board is. I don't know this to be so, but it reads like someone at AH challenged the designer to build a game on half a game board; or at least a single Squad Leader/Panzer Blitz-sized board.
 The second is how cluttered the game can become as a result of the board's size. The side-charts and org tables that we're so used to seeing in games these days aren't there and there's not even the off-map "battle board" for carrying out combats that would today be obligatory. One thing that I cannot decide if it be genius or madness is the placement of the POC (victory) track smack in the middle of Europe and at a 45-degree angle.
The third is that the game remains, as advertised in its rules, simple. There's really only three pages of rules -- though done up in a tiny print that is also, damnably, BLUE. The combat sequence is, of course, where the game got its nom de voyage, Dice at Sea, and the game can come down to a series of horrific rolls, but the sequence of ASW, U-boat, airstrikes, and surface combat remains refreshingly simple and easy to memorize.
 This isn't a review, though. It's a mash note, one I'm glad to write. The stories the designers were trying to tell in this game are clearer to me now as I better understand the battle for the North Atlantic. I get, for example, why the Allies want to smuggle those convoys across the North Sea and to the Soviet Union. I now understand why the British -- and the Germans -- have to choose between defending the North Atlantic and the Med and why the Germans have to keep a tight grip on the Med or risk losing the Spaghetti Fleet. I enjoy the mechanic under which both the U.S.S.R. and the U.S.A. aren't necessarily willing to sail in defense of the Allied cause and, in the case of the former, can force the British to defend the Baltic lest the Germans sail a single ship that way. And, knowing what I do about the big girl, I loved the look on HL's face when he first saw the Bismark take steam on turn two and make a beeline for his shipping. I figured it would distract him, but I didn't expect him to deploy the better part of half his fleet to bring her down. In the event, he was irate to do 9 points of damage (10 required) only to have me ship her back to Germany for repairs. Imagine his joy, then, when, during the airstrike phase, he rolled two 6s on three dice and sent her to the bottom with 10 points of damage.
Of course it's not Seekrieg. It's not close to the verisimilitude of 1805. It was, however, an evening of great fun, die rolling, and exploration; one that made me want to play again very, very soon.
Oh, and, to make the record clear, HL cleaned my clock. I did quite well in the early going, pantsing him rather badly in the Med. He rallied, though, and, by turn six, just about ever ship I had worth a tinker's cuss was populating the bottom of the sea.
Earlier this week, though, HL and I spent quality time with a very old friend that I did not realize was so dearly missed -- Avalon Hill's War at Sea.

The first thing that struck me was how small the board is. I don't know this to be so, but it reads like someone at AH challenged the designer to build a game on half a game board; or at least a single Squad Leader/Panzer Blitz-sized board.

The third is that the game remains, as advertised in its rules, simple. There's really only three pages of rules -- though done up in a tiny print that is also, damnably, BLUE. The combat sequence is, of course, where the game got its nom de voyage, Dice at Sea, and the game can come down to a series of horrific rolls, but the sequence of ASW, U-boat, airstrikes, and surface combat remains refreshingly simple and easy to memorize.

Of course it's not Seekrieg. It's not close to the verisimilitude of 1805. It was, however, an evening of great fun, die rolling, and exploration; one that made me want to play again very, very soon.
 |
| This round went reasonably well. Later on, not so much. |
Friday, November 25, 2016
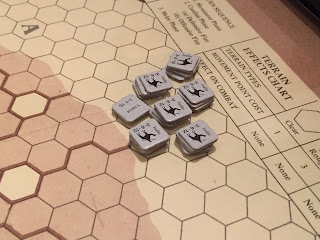
Kriegsspiel Dice
Just look at them. Just look.

There's a moment in the wildly underappreciated Might and Magic X: Legacy in which the brogue-speaking dwarf (female) calls on the party to "behold the great halls of Sudgurd". After the appropriate pause she says, with a fair amount of pique, "I don't think you're beholding enough".
I feel that way when I show these dice to people. They're not huge. In my case they're stickered badly. But, to me, they are grand.
Created by the folks at Command Post Games (their wonderful Pub Battles: Brandywine is the background to this picture) their blog makes it sound like they set these up almost as a lark. Given the title of my blog, though, it shouldn't surprise anyone that I take these very seriously indeed.
While Too Fat Lardies did the world service when it brought the Reisswitz kriegsspiel with several of its maps back into print, and Photon Cutter Studios made nice unit blocks available for a reasonable price, this is the third and final step. Now the combat tables that the Lardies created are no longer necessary and we can play the game the way the Baron did in 1824.
For those unfamiliar, each of the dice represents increasing strong combat odds, i.e. 1:1, 3:2, 2:1, &c. The left numbers are for musketry at various ranges, the right for skirmishers at these same ranges, the top and bottom for melee results. All these numbers are expressed in terms of points, each point representing a different number of men depending on the formation in question.
I could say so much about them, but I'll observe this: Baron von Reisswitz saw musketry as far more bloody than many contemporary Napoleonic rule sets and he -- and those that played his game and praised it -- knew well of what they spoke. I have a corps of red and blue troops courtesy of Photon Cutter and will now be compelled to press the lads into service. If only that I may roll these dice.
Command Post Games is here: http://www.commandpostgames.com/command-post-blog/
Too Fat Lardies is here: http://toofatlardies.co.uk/product-category/kriegsspiel/
Photon Cutter is here: http://www.photoncutterstudios.com/kriegsspiel.html
Proud to say I played a wee part in helping Photon Cutter get started in the kriegsspiel several years ago. Buy early, often, and in quantities no smaller than a corps per side!
CM:FB -- Baraque de Fraiture -- Fin
I did a brief write-up on this battle between Doug and myself a little while ago and, finally, it's come to an end. The battles in Combat Mission: Final Blitzkrieg tend to be on the long side and this one is no exception. That isn't necessarily a bad thing, but combatants can find themselves in situations where both are spent and have nothing to throw at each other. With a full half hour to go, Doug told me he'd proffered a cease fire and I was in no position to disagree.
As is often enough the case in a double-blind battle, it's what you didn't know that is the most pleasant surprise. In this case, it turns out Doug's boys had hot-wired one of Hobo's funnies and brought it a long to deal with the mine-clearing duties. Problem was, he lost in the first five minutes of the battle. Thus here, wide to my right, is this very expensive parking lot of immobilized monsters. Interestingly enough, my boys saw the KT as a Panther; rather the inverse of what I would have expected.
 This is my personal hero, the now blazing tank that took out so very much before being undone by a 'faust.
 A view of the carnage from up above. Comparison to an earlier photograph taken from roughly this perspective is instructive. My hero tank is at right. On fire.
 And looking the other way. This is the main route of Doug's approach. The little scrap yard at the outskirts of town, just off the bottom of this shot, was another surprise. One of the sadder stories of this one involved the artillery spotter who hid himself for much of the battle right near the center of town to call in danger-close fire on the TRPs you see in this picture. I pulled him back as the ranging shots began to fall only to have him shot up by a half-track I hadn't expected. Ever so.
 So how did we do? Well, considering that this was Waffen SS against, essentially, the guys in Kelly's Heroes that didn't go on the heist caper, I'm all but pleased with a minor defeat. As Doug himself said, though, if his tanks would have made it past the mines, this would have been a very, very bad day.
 I observe before passing that Combat Mission's scenario writers really seem to be wrapping their heads around the tools presented to them by CMx2. These are some great situations that go far beyond the challenge of "A Meeting at the Crossroads". Makes me wonder what they'll have in store for the East Front as they slowly walk that part of the series back in time as well as West Front scenario packs.
As is often enough the case in a double-blind battle, it's what you didn't know that is the most pleasant surprise. In this case, it turns out Doug's boys had hot-wired one of Hobo's funnies and brought it a long to deal with the mine-clearing duties. Problem was, he lost in the first five minutes of the battle. Thus here, wide to my right, is this very expensive parking lot of immobilized monsters. Interestingly enough, my boys saw the KT as a Panther; rather the inverse of what I would have expected.


Saturday, November 19, 2016
Doesn't Leave a Fellow a Lot of Time For Blogging!
More stuff what I wrote for Grogheads. This time in honor of the annual Tanksgiving ritual!
http://grogheads.com/?p=13200
http://grogheads.com/?p=13200
Wednesday, November 9, 2016
Sunday, November 6, 2016
Sunday, October 30, 2016
Do Not Judge Me!
My son, to whom I have given a pseudonym on-line for all the usual reasons, is very indulgent of my hobby. He's become very good at Memoir '44 and its derivatives and recently gave me quite a game of Jena 20.
That said, he's been after me for a while to wander to his side of the proverbial field. And, so, yeah, this happened...

He's been odd-and-ending his deck since Origins but I decided to buy a pre-constructed deck from the discount bin at a local Walgreens. I'd never played the game before and was surprised how simple it is. I suppose that's the demographic it's aiming at, but, again, my son is well advanced past the complexity level here. If only there were a way to figure out monetizing the different derivations of French troops, we might have something. "Dad, look here, I got the First Regiment of Marine Artillery!!" Well, a fellow can hope.

In fairness, the pre-built deck didn't feel gimped at all. This was something I was a bit surprised at as it seemed to play against the fierce monetization of the product. Once this bad boy was powered up (three fire energy, don't you know), my son had very little to stop him. I shudder to think, though, what the huddled masses at Origins and GenCon would do to me. I've dipped my toe into the YouTube and forum "best build" recommendations and have learned that the devotion to building a "best deck" is nothing short of Talmudic.
Twenty-five years after launch, I will confess I didn't hate the game and would play it again -- if only to make my son happy while I quietly set up 1806: Rossbach Avenged behind him
Sunday, October 16, 2016
Command and Colors: Epic Ancients -- Gaugamela
I've long been a fan of the Command and Colors series, if only in that it allows one to play out straight-forward games -- as opposed to anything resembling a simulation -- in a limited period of time to a satisfactory conclusion. These things cannot be said of many of C&C's more elaborate peers.
Tonight HL and I had a go at the epic Gaugamela scenario. I've been listening to The Illiad of late and wanted something of that "push of spear", blood-on-bronze, semi-naked man battling that it evokes. The setup is classic C&C, viz.: you get Darius' problems (no heavy infantry and three fewer command cards), Alexander's problem (many fewer fellows), and, yes, Alexander's Companions.
I decided to play matters fairly close to the event, at least initially. I ran up my light horse and started plinking away at HL's left while refusing on my own left. It takes no statistician to deduce, though, that trying to roll the sole green circle on a single die is not a recipe for success.

HL, on the other hand, was having none of my nonsense. He crashed into my phalanxes with his elephants and drove my psiloi hard and fast back onto their supports. The single-block unit below is having the textbook definition of a bad day.
 Seeing all this, I sent Alexander and his Companions into Darius' center-left. I'd be curious to know the thoughts of more experienced ancients hands than I, but the Companions (three, three-block medium horse units that can ignore their first hit and flags) are a serious foe. I didn't make matters any easier on Darius when I played "Clash of Shields" in the midst of the melee they caused granting each of my units two additional combat dice.
HL, sensing matters slipping away, played "I am Spartacus" and rolled reasonably well. Alexander himself was forced to survive two leader rolls and was whittled all the way down to a single block. In the end, though, it wasn't enough and the collapse of this sector alowed him to rack up the 12 victory blocks needed for the win.

The whole grand affair lasted less than three hours. Much to recommend in this, I think.
Tonight HL and I had a go at the epic Gaugamela scenario. I've been listening to The Illiad of late and wanted something of that "push of spear", blood-on-bronze, semi-naked man battling that it evokes. The setup is classic C&C, viz.: you get Darius' problems (no heavy infantry and three fewer command cards), Alexander's problem (many fewer fellows), and, yes, Alexander's Companions.
I decided to play matters fairly close to the event, at least initially. I ran up my light horse and started plinking away at HL's left while refusing on my own left. It takes no statistician to deduce, though, that trying to roll the sole green circle on a single die is not a recipe for success.

 | |
| Yep, still there. |

HL, sensing matters slipping away, played "I am Spartacus" and rolled reasonably well. Alexander himself was forced to survive two leader rolls and was whittled all the way down to a single block. In the end, though, it wasn't enough and the collapse of this sector alowed him to rack up the 12 victory blocks needed for the win.

The whole grand affair lasted less than three hours. Much to recommend in this, I think.
Thursday, October 13, 2016
Ogre -- Designer's Edition: Exercise K
I turned 50 a couple weeks ago and took the occasion to spend as much time as possible over two weekends playing wargames. Now, in general, my tastes have tended to heavier games of late, but, knowing I'd have a few old friends and HL to hand, I decided to take down something lighter namely the notorious "Exercise K" as played in the Ogre Designer's Edition.
For those unfamiliar with the former, the scenario is intended to represent a computer simulation testing the ability of ogres; no other way to explain the fact that you've got 12 ogres divided into four teams, each of which has two Mark IIIs and a single Mark V.
For those unfamiliar with the latter, this is the version of Ogre 6th edition that brought in nearly $1 million on Kickstarter and which comes in a box that could easily have four legs glued to the bottom and be turned into a coffee table. I bought it from Amazon a couple years ago and let my free shipping nearly pay for a year of Amazon Prime.
The scenario is simple enough, the four teams start out at the four corners of the map. Each corner has two radar stations and a single command post. Points are scored by destroying the structures (big points), destroying ogres (fairly big points), and damaging ogres (smaller points).
My friend Rob -- who had to leave the game and was ably seconded by MB -- wound up winning the game. While I started out with a significant initial advantage, I eventually fell to a grim fourth place as all three of my ogres were eventually incapacitated and then destroyed.
Some observations:
1. This is a long scenario. Allowing for the relatively brief learning of the rules, we went for the better part of seven hours.
2. There's a natural human tendency to have ogres slam into one another. This really ought to be resisted. While ramming does rich amounts of damage to opponents' treads, they damage yours as well and they distract from the rich points to be earned in taking out structures.
3. The original scenario was intended for 12 players playing on four teams. While the four teams worked fine, there were moments where we were able to coordinate our teams far better than we thought they'd have been coordinated if there were two other players on our side.
4. The ogre war room app -- available free in the store -- is an hoot and a great way to keep track of ogres as well as dice-rolling. All but made for Exercise K.
 | |
| Sprouty McBunstuff (at right) didn't make it. |

 | |
| Like I said, we got obsessed with ramming. |
 | |
| One of the last fights... |
Saturday, October 1, 2016
Remember Gordon! -- Campaign Game -- An Unsatisfying Finale
It will be remembered that my Anglo-Egyptian forces were making their slow way under the careful cover of their gunboats to the City of Omdurman. They looked a bit like this:
 At this point, we've already bounced several bands of Mahdists who, unwisely, attacked piecemeal through the gap in the hills to the North of our position as well as from behind. I came quickly to realize that the basic premise of the game is that the A-E forces are going to wipe out just about everything the Mahdists can throw at them, but if so much as one Mahdist slips through the A-E defensive fire, it stands a very good chance of killing one or two units that the A-E army cannot lose.
One thing the Mahdists have a very difficult time doing, however, is taking out the A-E gunboats unless they're willing to line the West bank of the Nile island above with fortresses.
I continued my advance and soon had brought my Egyptian units to within sight of Omdurman -- the city visible at the top left of the photograph below. While MB's Mahdists were able to kill all but a very few of these units in the end (they're the white regiments depicted in the below), by this point the Mahdists had suffered so many casualties that we both agreed the outcome was a foregone conclusion.
 I wanted very much to like this game and it assuredly had its moments -- and I will give it another try -- but, in our first go, the tension that should have been so much a part of the actual fighting between the two sides got lost in an extremely convoluted firing sequence. It runs like this:
1. Mahdists Advance
2. A-E Defensive Direct Fire (including Maxim guns)
3. A-E Maxim gun second fire
4. A-E howitzer fire (from gunboats)
5. Mahdist fire
6. Melee
And the combat itself -- counting, doubling, halving, &c., and then totaling combat factors before cross referencing the result on a chart -- seemed pleasant at first but really became a grind with so many units involved. Related to this, the A-E army can quite easily get its fire power over the highest level allowed for on the chart making the addition of further forces all but wasteful, even if they're in the area.
It now seems clear to me that the only hope of the Mahdists is to gather their forces and hit the A-E army in waves tightly choreographed to wash up one after the other. I hope it proves to be fun. Thus far I'm not sure.
The final game state is below.


One thing the Mahdists have a very difficult time doing, however, is taking out the A-E gunboats unless they're willing to line the West bank of the Nile island above with fortresses.
I continued my advance and soon had brought my Egyptian units to within sight of Omdurman -- the city visible at the top left of the photograph below. While MB's Mahdists were able to kill all but a very few of these units in the end (they're the white regiments depicted in the below), by this point the Mahdists had suffered so many casualties that we both agreed the outcome was a foregone conclusion.

1. Mahdists Advance
2. A-E Defensive Direct Fire (including Maxim guns)
3. A-E Maxim gun second fire
4. A-E howitzer fire (from gunboats)
5. Mahdist fire
6. Melee
And the combat itself -- counting, doubling, halving, &c., and then totaling combat factors before cross referencing the result on a chart -- seemed pleasant at first but really became a grind with so many units involved. Related to this, the A-E army can quite easily get its fire power over the highest level allowed for on the chart making the addition of further forces all but wasteful, even if they're in the area.
It now seems clear to me that the only hope of the Mahdists is to gather their forces and hit the A-E army in waves tightly choreographed to wash up one after the other. I hope it proves to be fun. Thus far I'm not sure.
The final game state is below.

Tuesday, September 27, 2016
Remember Gordon! -- Campaign Game
The Beggara tribe made a hard run at the vanguard of the Anglo-Egyptian column and got bounced very hard. The British and their allies have mad rifle factors and are doubled at one-hex range. Despite reducing the attackers to a single unit, though, I was reminded that every A-E unit is all but irreplaceable in the scheme of the game's victory points. MB attacked with three full stacks of four camelry each and was left with a single disrupted unit, but that one unit, had it managed to spear and club down one of my infantry regiments would have done real damage. A good reminder for the future.
 Also above, my named gunboats (at left) fired fecklessly at the approaching Madhists as well as one of the fortresses off shot to left. Assuming it to be a matter of some significance, I've begun shuttling my "Friendlies" brigade (Sudanese fighting for the A-E) over the Nile. Each unit absorb a gunboat for two turns, this loading sequence being the first.
These fellows, I think me, approaching from the Northwest, intend me ill.

These fellows, I think me, approaching from the Northwest, intend me ill.

Monday, September 26, 2016
Napoleon's Last Battles -- Campaign, Summer to Fall '16 -- The Trap Closes and Fin

I knew Blucher was wandering around to my right rear and had thought to reshape my lines to better protect their exposed right. I also knew that Blucher was the only commander out that way so assumed it would be at least one more turn before MB could snap the trap shut.
I was wrong.

This is the aftermath of a 12 SP loss that also felled Marechal Grouchy. It was preventable, but I desperately wanted VI Corps (which sustained these losses) to stay in the game for as long as was possible.
Over on the left, I eliminated the forces of the Netherlands and the Brunswickers entirely, but there was no practical way for me to make up the points lost on the right. A most gentlemanly concession promptly follows.

This game is about "pushing" rather than killing. There just aren't enough killing results on the CRT to make direct fights worth the trouble. Throw into the mix the dreaded exchanges and you've a recipe for cautious advance.
The most effective way to kill units in this system is to ZoC eliminate them. I blame the fact that I've been playing the John Tiller Napoleonic games with ZoC elimination off for so long for my having forgotten this basic principle until it was far too late.
I know not what course others may take, but, as for me, D'Erlon and I Corps have to march like a rifle shot to cut off the Prussians at Ligny. They will then either die of a lack of supply or have to fall back quickly. I should have seen this sooner and taken advantage.
Overall, I'm looking forward to my next chance to play. Even if this round, as I had to concede to HL, has me headed off to St. Helena.
Vive L'Empereur!
Sunday, September 25, 2016
Napoleon's Last Battles -- Campaign, Summer to Fall 2016 -- 13
Four turns of daylight to go so I sent in the Guard. The risk there, of course, is that any adverse result will drop all French demoralization levels by 20 points. Deciding nothing ventured is nothing gained, I launched the bulk of the guard at Ponsonby's men who had stuck their elbow out near a small stream. My greatest fear, as always, was an Exchange, but I got a Defender Retreat and round one of the final fight went to the bearskin hats.

On the Allied right, I've now caused enough casualties to demoralize all of HL's troops except the British themselves and they're only 4 SPs away. The biggest consequence of demoralization is that it doubles the movement cost of clear terrain and everything else gets worse from there. As I've still got a notion of scampering Northwest in a desperate bid for VP, slowing him down that dramatically would be a good thing indeed.
That said, MB's Prussians are developing a pincer around my right that would have closed turns ago if it weren't for the fact that she's only got Old Vorwaerts to give orders to her corps.
 She came hard after my right flank a couple turns ago, but managed only a DR despite having a 4:1 advantage. Perhaps more importantly to history, Grouchy survived the repulse.

On the Allied right, I've now caused enough casualties to demoralize all of HL's troops except the British themselves and they're only 4 SPs away. The biggest consequence of demoralization is that it doubles the movement cost of clear terrain and everything else gets worse from there. As I've still got a notion of scampering Northwest in a desperate bid for VP, slowing him down that dramatically would be a good thing indeed.
That said, MB's Prussians are developing a pincer around my right that would have closed turns ago if it weren't for the fact that she's only got Old Vorwaerts to give orders to her corps.

Saturday, September 24, 2016
Napoleon's Last Battles -- Campaign, Summer to Fall 2016 -- 12
The morning of June 18, 1815, has come and the French are a healthy distance South of Waterloo.
Still, we'll fight where we stand and that means pounding the Allied right. HL's allies, notably not the British, took a bad beating in recent combats but, unless matters change dramatically, I'll likely get nowhere near the 230 VP I need for victory. For those unfamiliar, I score 1 VP for every Allied strength point killed, two for every French strength point exited from the map en route to Brussels, and lose one VP for every point lost by the French. This, among other things, is what makes the exchange CRT result so dreadful.

The pocket is closing around the British, but, just off camera to the right, MB's Prussians seem to be plotting an envelopment of their own. The Allies face an interesting choice in that they only need to prevent the French from earning VPs to win. This can encourage the 19th Century version of the prevent defense.

And it's little bits and bobs of the Allies to the Northwest that prevent me from being able to bolt for Brussels.
Wednesday, September 21, 2016
Remember Gordon! Campaign Game -- And a Wee Bit of Napoleonic Info
I am greatly enjoying the tortuous decisions Remember Gordon! is forcing on me. My column continues its slog and, as suspected, MB's mahdists are bearing down on me in earnest. My forward infantry brigade (the Third Egyptian) has reached the spot at which it could build the zariba. The problem is that it would have to give up an entire turn to do so for each hexside it wanted to construct. At most, in one turn, its three regiments could build six hexsides -- hexsides the mahdists would be free to ignore with near impunity.
We did manage to disrupt a single charging camelry unit with artillery fire, but our combined howitzer fire from the Nile gunboats scattered well away.
The forward-most troops are arrayed as below:

On an entirely other front, sides have been chosen for the Vol de L'Aigle Kriegsspiel I'm soon to be running on the October 1806 Jena campaign. Organizational details are available here: http://grogheads.com/forums/index.php?topic=17869.0
I trust it will bear watching.
Saturday, September 17, 2016
Combat Mission: Final Blitzkrieg -- Yeah, well, take THAT!
Once again it was Combat Mission: Final Blitzkrieg's turn to give me one of those moments that remind me of why I play games like this. The scenario is a remarkable one centering around the fight for Chaumont. My Allies have been losing badly to the well-hidden guns and better tactics of my opponent. Stuck on the lee side of a high ridge, almost afraid of sticking our heads over the crest, in the last minutes of the game I've managed to creep towards a few of the VPLOCs to save honor if not a win.
In so doing I've desperately been trying to bring CAS down onto a house where I know a fair number of Wehrmacht are hidden. I have waited. And waited. And cursed. And waited.
Then, this turn...
In so doing I've desperately been trying to bring CAS down onto a house where I know a fair number of Wehrmacht are hidden. I have waited. And waited. And cursed. And waited.
Then, this turn...
Thursday, September 15, 2016
Remember Gordon! - Campaign Game
The best wargames tell a story. They don't just talk about the history of the events as one could find in any history book, but they make a case that events unfolded a particular way. This, in part, connects to the notion that a player ought to be able to use the same strategy and tactics employed by participants and get similar results. Going farther, though, it ought to give the player a feel for the challenges faced by those participants and, as organically as possible, take the player to the critical moments where battles broke one way or another and let the player explore both why and what can be done.
The "Remember Gordon!" campaign game is doing a nice job of this so far.
My Anglo-Egyptians are toddling slowly down the West bank of the Nile. Some can move faster than others, but I don't want to string out the route of march too much so I'm trying to be patient. The lead elements are almost at the spot where the zariba was built.
 On the other bank, I've sent the "Friendlies" brigade (loyal Sudanese) down to kill the only enemy regiment on that side of the river while trying to stay well clear of both the Mahdist gunboats and fortress guns.
 All this said, every swinging camel hump between here and Cairo is now bearing down on my relatively small band of marchers. And this is only the first wave of several to come. There's really only once place to go, the gap between the rough terrain visible at the top of the first photo above, and they should be through by the time I hit the zariba space. Nervous times...

The "Remember Gordon!" campaign game is doing a nice job of this so far.
My Anglo-Egyptians are toddling slowly down the West bank of the Nile. Some can move faster than others, but I don't want to string out the route of march too much so I'm trying to be patient. The lead elements are almost at the spot where the zariba was built.


Wednesday, September 14, 2016

Tuesday, September 13, 2016
Napoleon's Last Battles Campaign -- Summer 2016 -- 11
Now realizing that I'll have to start calling this Fall 2016, the rain and night turns spanning June 17-18 have now ended. For those unfamiliar, in this system, rain and night prohibit both sides from doing anything but moving. Units may not enter one EZsoCs and, as a result, may not initiative combat.
MB took this opportunity to drive her Prussians on the straightest possible route to Wellington's left. She also did an adroit job of using ZsoC to block any attempt at my falling on her rear and disrupting her lines of a supply. Combine this with HL's careful withdrawal northward and one gets a battle line drawn well south of Mt. St. Jean. To wit:

On the plus side of things, I finally managed to take advantage of a 6:1 on my left, destroying a brigade of Netherlands' cavalry and infantry. This, couple with Perponcher's untimely demise the day prior, makes HL's right all the more tenuous.

On my right, however, especially near Ligny (yeah, I know, I should have been long gone), there is just some sort of weird ahistorical buggery going on. During the night, MB maneuvered a small group of Prussian cavalry around to my right, in my mind threatening my dodgy supply lines on that flank. In the end, though, it was a demonstration and I over-committed troops I am going to want elsewhere. With morning come, she's kept the better part of a division in the area, doing her level best to keep them from joining the "A" fight to the West. We're going to have to swing well wide to avoid her. I can't believe she'll want to pursue much further, but one never knows.

And, finally, I played RISK! for the first time in an age, and for the first time with HL. MB has long loathed it, referring to it unaffectionately as "making change with (by turns) soldiers, hobbits, robots, Daleks, &c." depending on the re-imagining of it. I was wooed by the new edition's cover art (although French heavies attacking Crimean-era gunners is a little weird) and the promise of the Secret Mission system to prevent the game from lasting six days short of forever. It succeeded admirably in this, but it remains RISK! and, as a consequence, continues to receive a "Nope" on MB's scale of "Sure" - "OK" - "Nope".

Monday, September 12, 2016
A Wee Bit of Self-Promotion?
Looking forward to running a forum-based Kriegsspiel as part of a series on the battle of Jena I'm writing at grogheads.com. Everyone interested in the period or an army-level KS is more than welcome to sign up.
Our numbers stand at six, but we could certainly take a few more.
All the opening info is here:
http://grogheads.com/forums/index.php?topic=17808.0
Our numbers stand at six, but we could certainly take a few more.
All the opening info is here:
http://grogheads.com/forums/index.php?topic=17808.0
Sunday, September 11, 2016
Sicily '43 -- The End
Going from 600 to nearly 1,000 visits in a day is a rather nice thing. Feel obligated to provide content.
PzC Sicily '43 three-way game just wrapped up this evening. You can read more below, but the bottom line was that the scenario sought to simulate Patton and Monty's race for Messina. I was the Wehrmacht and my friends Doug and Charles were the Americans and the British respectively. The scenario notes make clear that the Axis really isn't supposed to win this one, but we actually pulled off a major victory.
This is as close as either side got to Messina:
 In fairness to both fellow, the terrain in Sicily is ghastly and really does benefit the defender. Combine that with the hard ZsoC in this system and you have a recipe for very slow going.
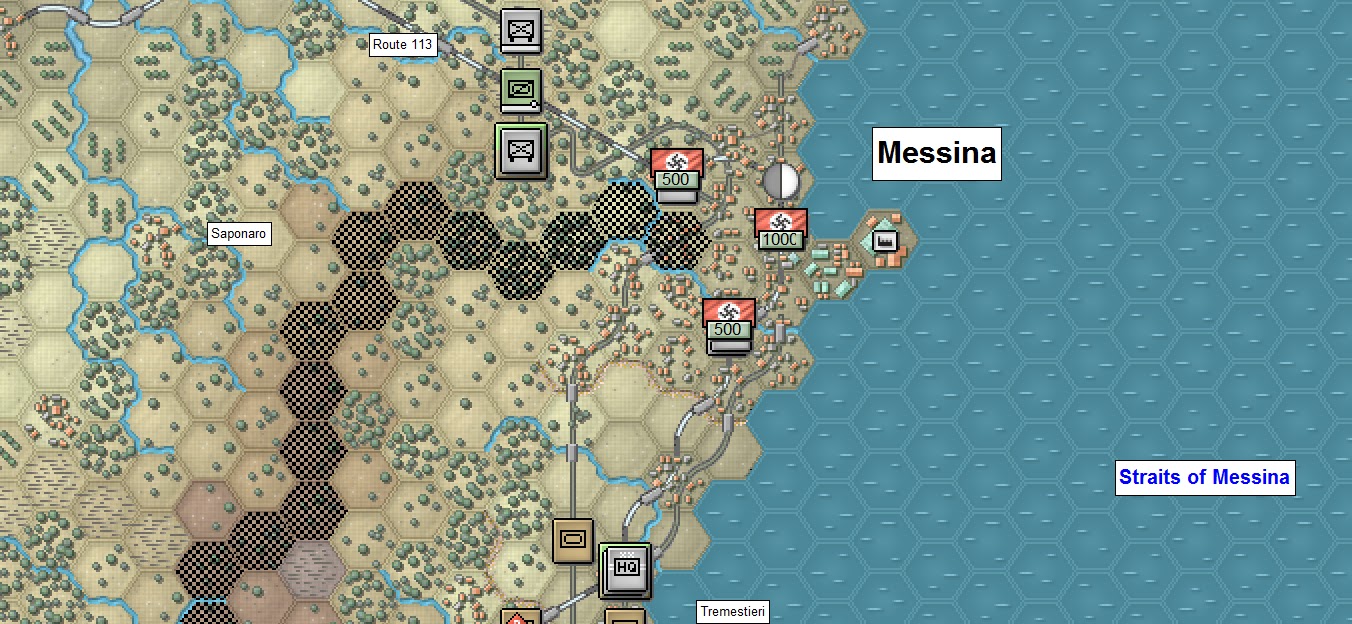
This is a longer view of the end game:
 I didn't care over much for counting VPs on this one. After all, the Axis has had to leave (the HG Division left hours before the end...bastards...) and the Allies controlled the island, but I'm pretty pleased that I locked them this far out of town. For those tracking such things, the Allies were stuck at a Major Defeat and would have needed another 1,000 VPs to get out of it.
Again, though, this is a great series and the game was an hoot.
Recommended.
PzC Sicily '43 three-way game just wrapped up this evening. You can read more below, but the bottom line was that the scenario sought to simulate Patton and Monty's race for Messina. I was the Wehrmacht and my friends Doug and Charles were the Americans and the British respectively. The scenario notes make clear that the Axis really isn't supposed to win this one, but we actually pulled off a major victory.
This is as close as either side got to Messina:
This is a longer view of the end game:

Again, though, this is a great series and the game was an hoot.
Recommended.
Saturday, September 10, 2016
Death of a Village -- a Small CM:FB Photo Essay
I play an awful lot of games -- I regret nothing -- and in that whirl of experience I can sometimes forget or take for granted those that are truly great. The Combat Mission series, from its beginning over a decade ago, has been and is truly great.
One of the neat things about games that have a lineage like this is fans of the series get involved and improve OOBs, make vehicle skins, and can make crazy-accurate maps and scenarios.
My friend Doug and I have been pounding around Belgium for the past several months working on one of the scenarios for Combat Mission: Final Blitzkrieg. Eponymously named "Baraque de Fraiture" it tells a part of the story of a worn out group of G.I.s who hold out against not only the 506th Volksgrenadier Division but the "Das Reich" 2nd SS Panzer for the better part of 24 hours granting critical relief to the men of the 82nd Airborne Division trapped at Bastogne during the Battle of the Bulge.
As good as this history is, though, what struck me after finishing my turn this morning was how this battlefield has evolved over the last hour and 15 minutes of game time. Doug's Germans, true to the story, have a hellacious group of artillery stonks at their disposal and no small amount of armor. He's too good a commander, however, to trust in artillery. He knows that the only way to be certain that there's no one with a bazooka inside one of these well-built buildings is to knock it down. And so he has. Turn after patient turn. This is just a small photo essay of some of the results, centering on the village itself.
 | |
| The road in. I, obviously, can't see Doug's vehicles, but I can see the smoke from those I've destroyed. |
 | ||
| Further down the road, Doug had to cross this bridge under fire. |
 | |
| The crossroads at the heart of the village looking west. Burning Shermans make me sad. |
 | |
| This one made me angry. Driver couldn't back up quickly enough. Entry hole for the round that killed her is evident. |
 | |
| Same tank, but further back. |
 | ||
| Overview of the village from the rear. Doug's troops approached from the top of the screen. The Sherman from the photos immediately above is at the bottom. |
An interesting website about the memorial to this battle is here: http://www.battleofthebulgememories.be/stories26/us-army25/61-a-memorial-at-baraque-de-fraiture.html
Sunday, September 4, 2016
It really does help one understand how angry Monty must have been...
As we wind down our three-way game of Sicily '43 (seven turns to go after this one), night has come and nothing I'm about to write could prove to be true come the dawn. I know the Americans have managed to smuggle a few recon units behind the lines, although one of their number drove straight into one of my last redoubts in the dark and got itself disrupted.
Still, I've got very little to prevent Patton from steamrolling me if he chooses to do so over the last 14 hours or so of real time.
 | |
| There are likely a whooole lotta guys betwen Fumari and Villafranca Terrena. |
I now officially am declaring Monty out of the running. The hard, locking ZsoC in the PzC series have him held pretty fast along the highway with little maneuver to the West. Two companies of beaten, but "A" morale men are dug in like ticks and they won't be easy to dislodge.

Subscribe to:
Posts (Atom)